
The finished system
| Component | Purpose | Pass condition |
|---|---|---|
| Sending domain | Establish sender identity | MailerLite reports authentication as successful |
| Group | Store explicit signup intent | Test subscriber enters the correct group |
| Form | Collect consented signups | Copy, privacy link and confirmation work |
| Welcome automation | Deliver the promise | Messages arrive in order with correct links |
| Campaign | Publish the first newsletter | Desktop, mobile and unsubscribe tests pass |
| Report | Measure useful behaviour | Clicks and subscriber activity are visible |
Before opening MailerLite
These decisions prevent the interface from dictating the strategy. The tool should implement a clear promise, not invent one.
- Write the one-sentence newsletter promise.
- Choose a domain-based sender address.
- Decide whether double opt-in is required or preferable.
- Prepare the privacy-policy URL and consent copy.
- Write the first welcome email in plain text.
- Create two test inboxes on different providers.
1. Create the account and complete approval early
Enter accurate organisation and sender information. New accounts receive a premium trial, but account review and sending eligibility should be resolved before a launch date is announced.
Inspect the current plan immediately. Trial features can disappear after 14 days, so note which capabilities belong to Free, Comfort or Power before building workflows.
2. Authenticate the sending domain
Open the domain settings and copy the exact verification, DKIM and SPF instructions into the DNS provider. If an SPF record already exists, do not publish a second one. Merge authorised services into one valid record according to the provider's documentation.
Wait for propagation and confirm success inside MailerLite. Add DMARC according to the sending domain's policy and monitoring plan. Authentication supports sender identity, but it does not replace consent or list hygiene.
3. Create a durable group and a useful segment
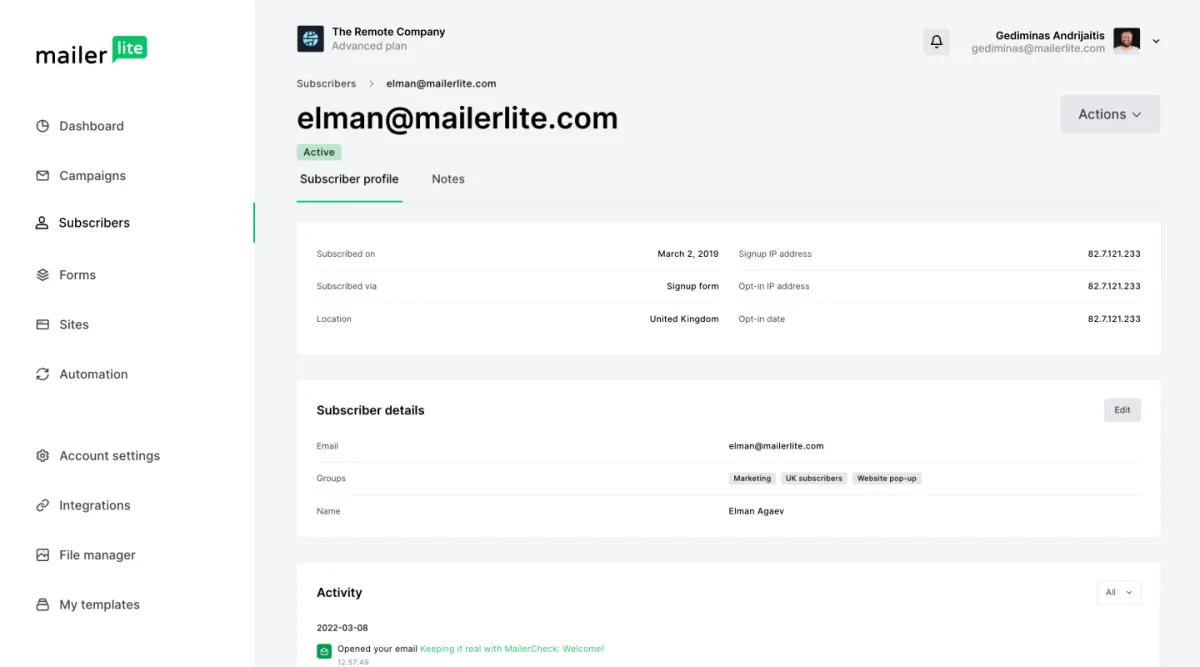
Create one explicit group such as Newsletter Main. Groups behave like tags or lists and work well for signup source, interest and workflow entry. Avoid names tied to a temporary campaign unless the provenance must be retained.
Create a segment only when membership should update from rules. For example, clicked any newsletter in the last 30 days is a segment, while downloaded Pricing Checklist is a group.
4. Build the signup form
Email alone creates the lowest-friction form. Add a name or preference only when the first messages genuinely use it.
- Ask only for fields that will change the experience.
- State what will be sent and how often.
- Link to the privacy policy.
- Explain confirmation when double opt-in is enabled.
- Send the form to the intended group.
- Design the success message as part of the journey.
5. Create the welcome automation
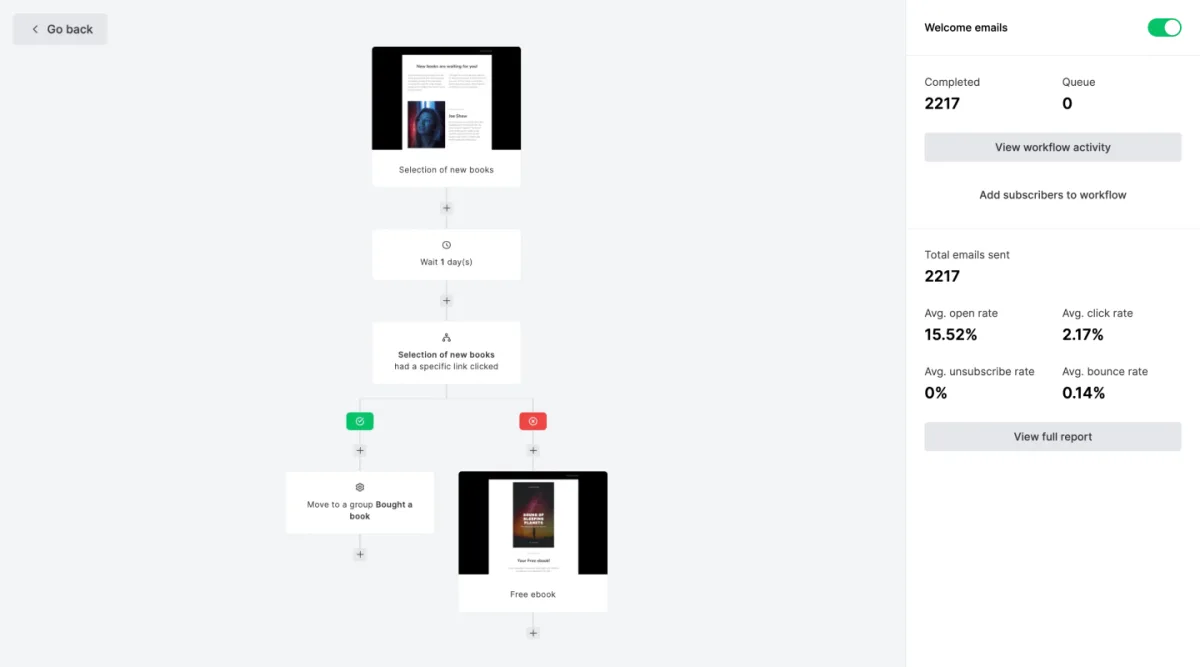
Use joins a group as the trigger for a durable newsletter welcome. Deliver the promised resource immediately, then add a delay before later messages. A simple three-message sequence can deliver, teach and introduce the next step.
Add a condition only when both branches have useful content. Exclude existing customers where appropriate and decide whether a subscriber may re-enter the workflow.
6. Design the first email
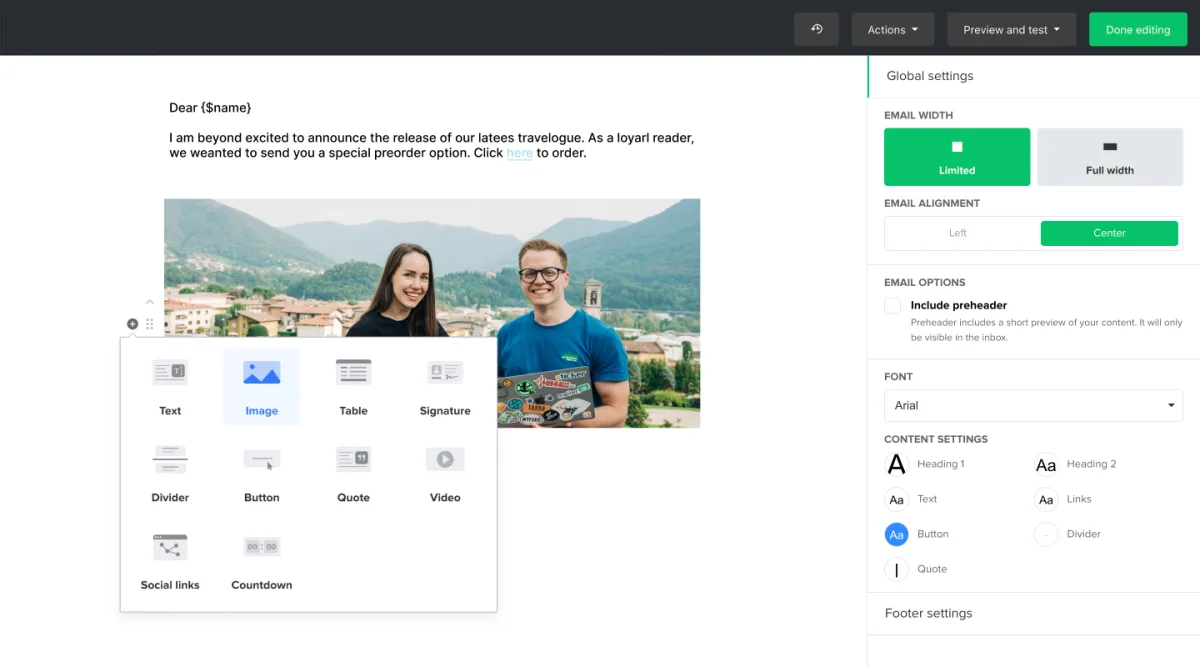
Use the editor that matches the job. A simple editorial newsletter rarely needs a complex visual template. Keep the sender, subject, preheader, main action and footer clear.
Preview desktop and mobile versions, send tests to different inbox providers and click every link. Check the plain meaning of the message when images are blocked.
7. Send a controlled first campaign
Send to internal test addresses first, then to a small consented group if available. Confirm the correct recipients and exclusions before scheduling. A campaign cannot compensate for unclear consent or a poorly defined promise.
Record the purpose before sending. A first campaign might aim for replies, clicks to one guide or completion of one setup task. Select one primary action.
8. Test the entire subscriber journey
| Test | Expected result |
|---|---|
| Submit form | Subscriber is created with the intended status and group |
| Confirm signup | Confirmation succeeds and does not loop |
| Receive welcome | Correct sender, content and links |
| Wait step | Later messages do not arrive immediately |
| Unsubscribe | Future promotional messages are suppressed |
| Export | Required fields and group membership are present |
9. Read reports without vanity metrics
Inspect delivery, clicks, replies, unsubscribes, complaints and automation progress. Open rates are directional because privacy systems and image blocking affect them.
Compare messages with the same purpose. A lower-open email that produces more qualified replies can be the better result.
Common setup mistakes
- Waiting until launch day for approval or DNS changes.
- Creating a second SPF record.
- Using segments where a durable group is required.
- Collecting fields that never change messaging.
- Sending several welcome emails with no delay.
- Building with premium trial features without checking the final plan.
- Testing only the editor rather than the complete signup and unsubscribe path.
Tutorial FAQ
Should a beginner use double opt-in? It can strengthen list quality and evidence of confirmation, but the legal and commercial context matters. Configure the confirmation experience deliberately.
How many welcome emails are enough? Start with one to three. Add messages only when each has a distinct purpose.
Should contacts be imported immediately? Import only permission-based contacts with documented provenance. Clean and map fields before uploading.
When is the setup ready? When a new person can subscribe, receive the promised content, follow the intended sequence and unsubscribe without manual intervention.